
How to Convert the Traxxas TRX-4 Wheelbase

How to Convert the Traxxas TRX-4 Wheelbase
Shorten Your Wheelbase from 324 mm to 312 mm
Traxxas designed the TRX-4 from the ground up to be the most versatile RC crawler platform on the market. The TRX-4's chassis allows multiple wheelbase configurations to fit a variety of different bodies. The 312 mm (12.3") wheelbase is the most common, found on the Sport, Bronco, Blazer, and G 500 models, but the chassis also supports 300 mm (11.8"), 324 mm (12.8"), and 336 mm (13.2") configurations.
If you have the Land Rover Defender or Tactical Unit models utilizing the 324 mm (12.8") wheelbase, you may want to experiment with a different setup. Maybe you want to explore the driving dynamics of a short wheelbase or maybe you just want a fresh new look for your ride. No matter what your reasons, Traxxas makes an all-inclusive kit to convert your wheelbase and it's even easier than you think. Let's get started!


#8058 Chassis Conversion Kit
Converting a TRX-4 to a 312 mm wheelbase is easy thanks to the all-inclusive #8058 Chassis Conversion Kit. The kit includes the shorter rear links and half-shaft required for a 312 mm wheelbase, plus front and rear inner fenders and a front battery tray. If you prefer not to use the inner fenders, you can retain the stock shock towers—we’ll cover both setups in this article. Don’t worry if you want to go from a short to a long wheelbase, there’s a kit for that too! The #8057 Chassis Conversion Kit does the job and installs in just the same way as the kit were showing here.
312 mm Wheelbase with Inner Fenders
The inner fenders supplied with the #8058 conversion kit are standard width, as used by the Chevy Blazer and Ford Broncomodels. If you would like to fit the Sport or Mercedes G 500 body to your TRX-4 chassis, you will need to use the #8080 Narrow Inner Fenders. For this how-to, we’re going to convert a TRX-4 Tactical Unit to 312 mm and install the #8130X Chevy K5 Blazer body in orange and white. You can also get the Blazer in red and black, #8130R. Both Blazer body kits come pre-assembled so they're ready to mount right out of the box.
1) Begin by removing the body and wheels. Next, remove the four screws that secure the front and rear body mounts. Set the body mounts aside.

Remove the Body & Wheels

Remove the Front Body Mount

Remove the Rear Body Mount
2) Remove the screws that secure the shocks to the shock towers.
Remove the Front Shocks

Remove the Rear Shocks
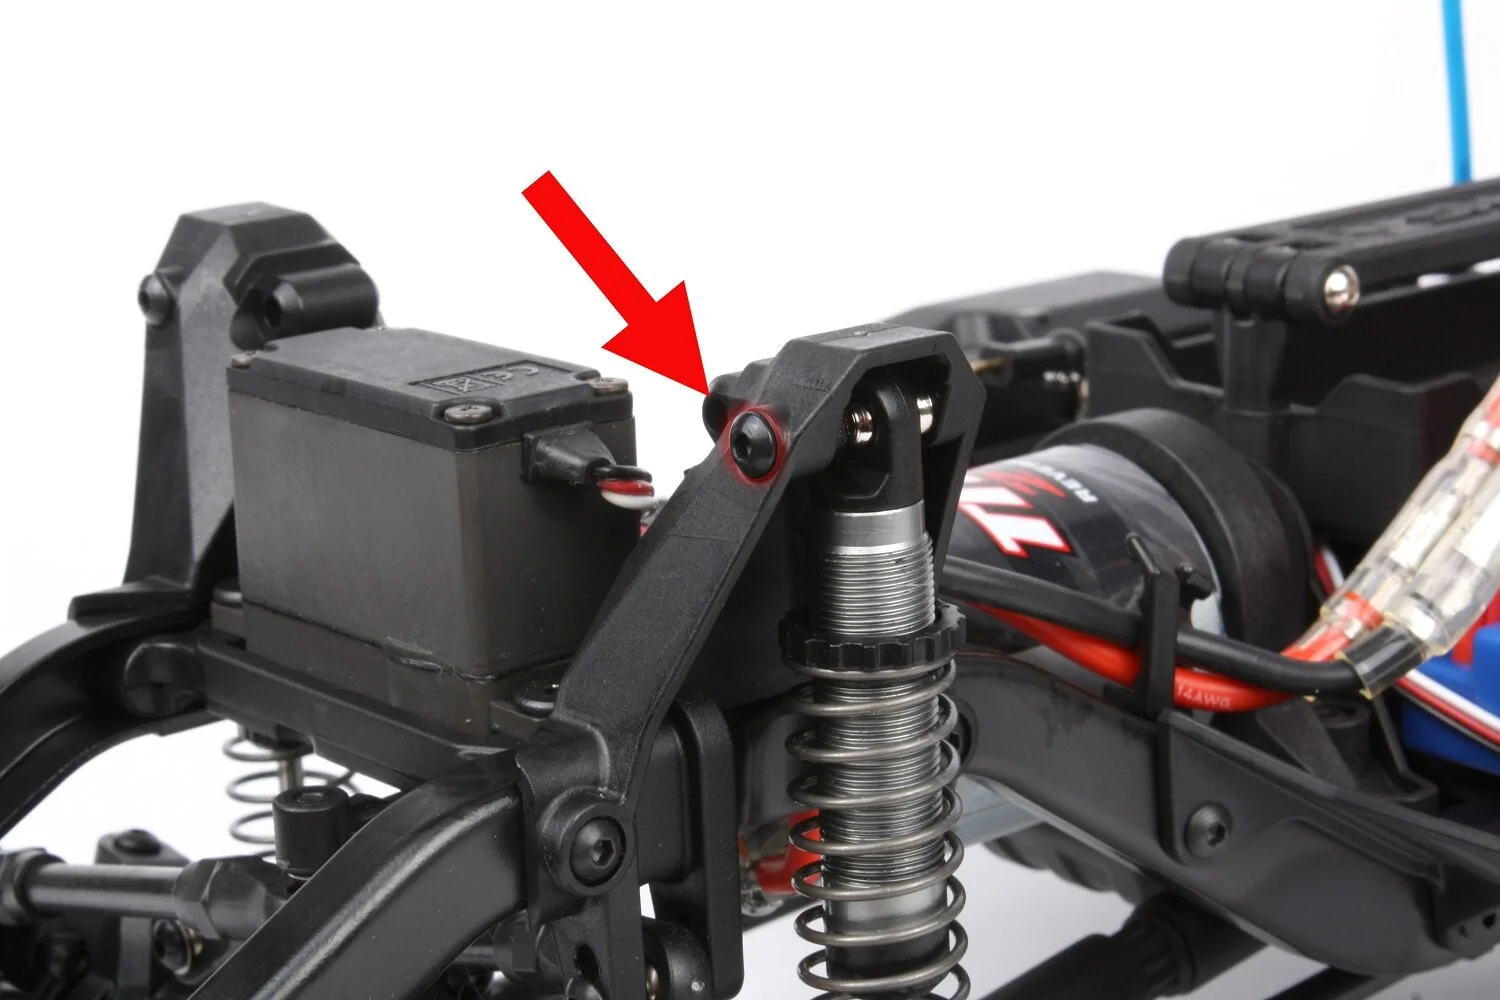
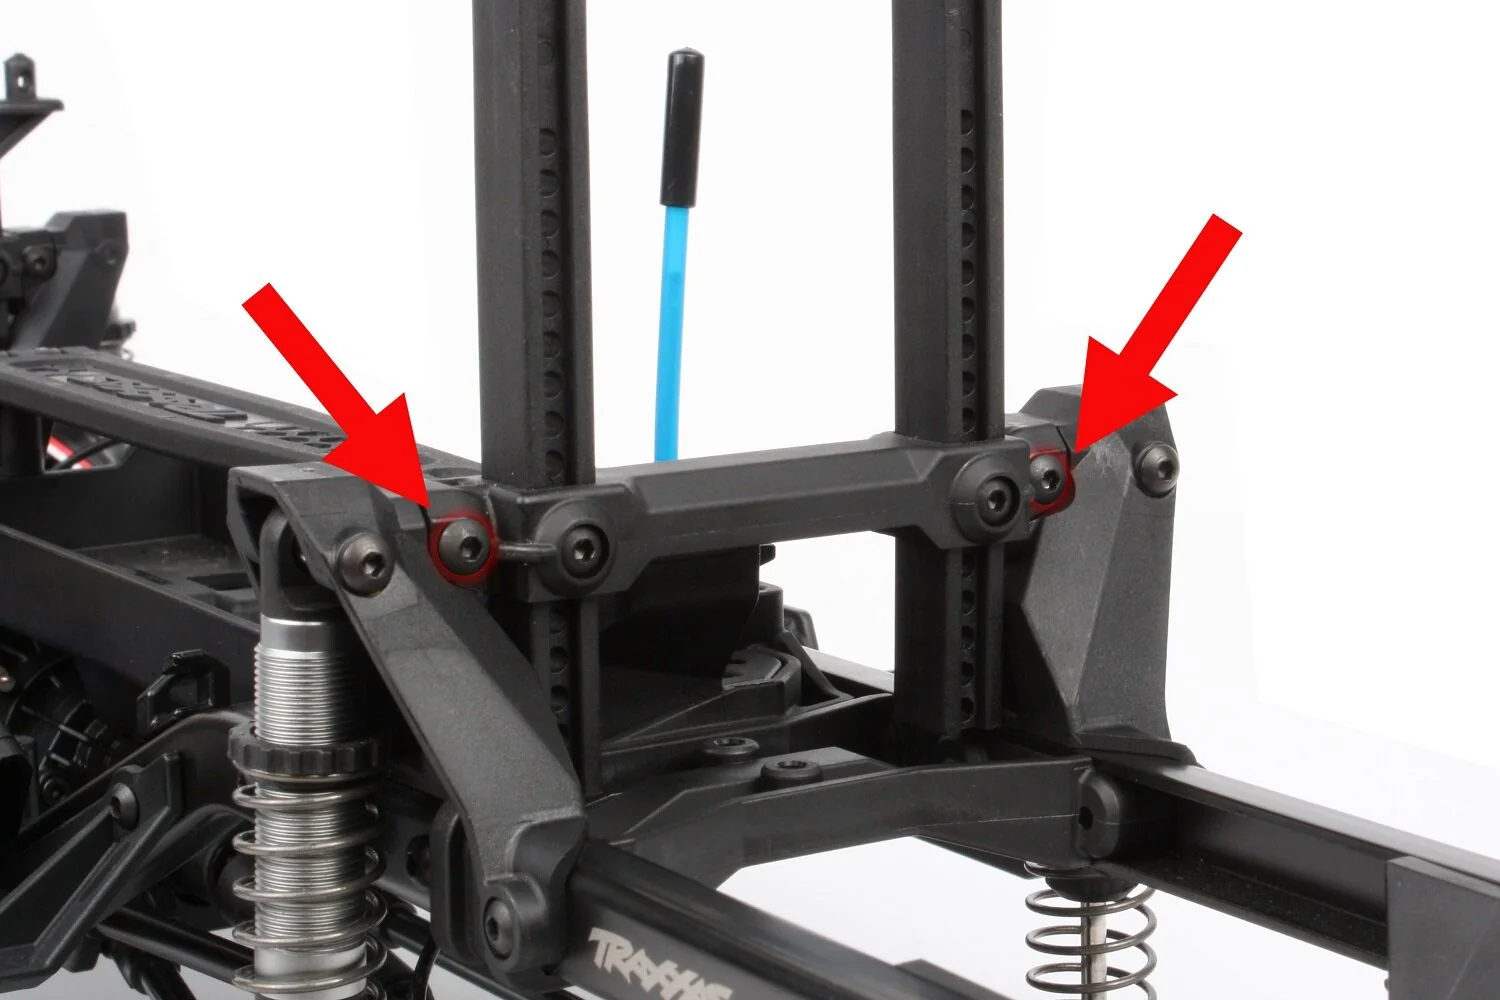
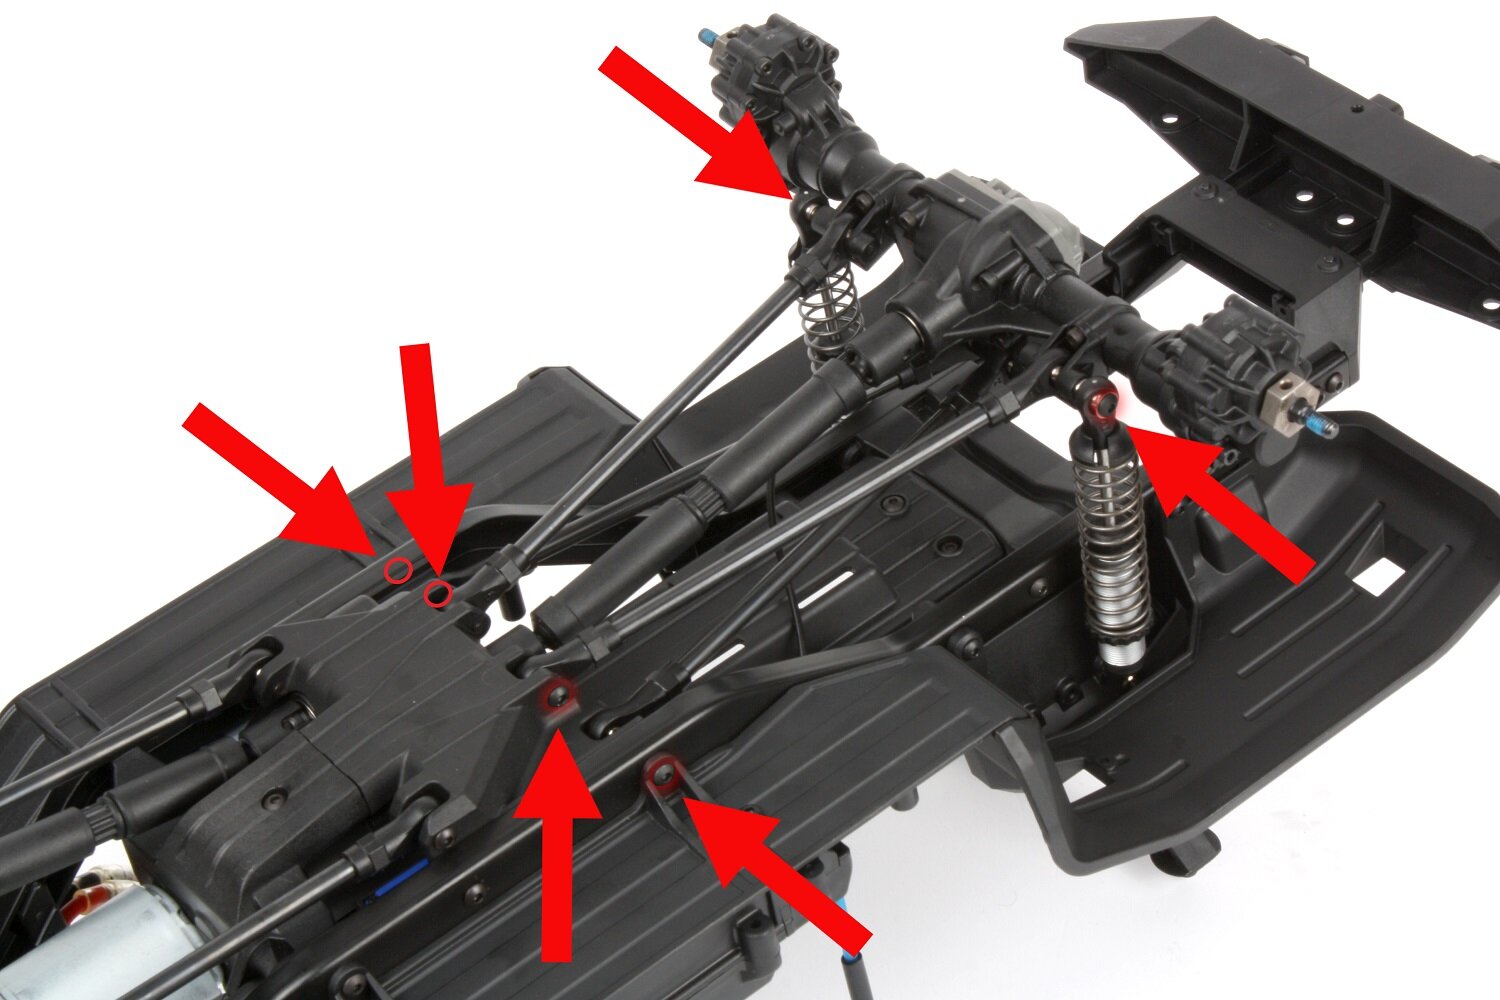
3) Remove the screws shown from each of the shock towers, and remove the Panhard bar screw from the left front shock tower. Also remove the screw that passes through the chassis rail into the battery tray.

Remove the Front Shock Towers

Remove the Rear Shock Towers
4) Install the inner fenders in place of the shock towers, using the hardware removed in step 3. Note that the fenders are labeled RF (Right Front), LF (Left Front), etc. for goof-proof placement. Next, install the front battery tray using the supplied 5x8mm flat-head screws.

Check the Label

Install the Battery Tray

Install the Battery Tray
5) Reinstall the front and rear body mounts onto the inner fenders using the 3x20 mm screws you removed in step 2. Next, reinstall the 3x23 mm screws to secure the shocks to the inner fenders. Install the rear shocks one hole ahead of the farthest-rear position.

Reinstall the Front Body Mount

Install the Rear Shocks
6) Remove the screw that secures the rear upper links to the rear axle. Next, remove the rock sliders for easier access to the screws we’ll be taking out in the next step. Four screws secure each rock slider. Finally, flip the chassis over and remove the screws that secure the lower links to the axle, and remove the screws that secure the upper and lower links to the chassis.

Remove the Axle Screw

Remove the Rock Sliders

Remove the Link Screws
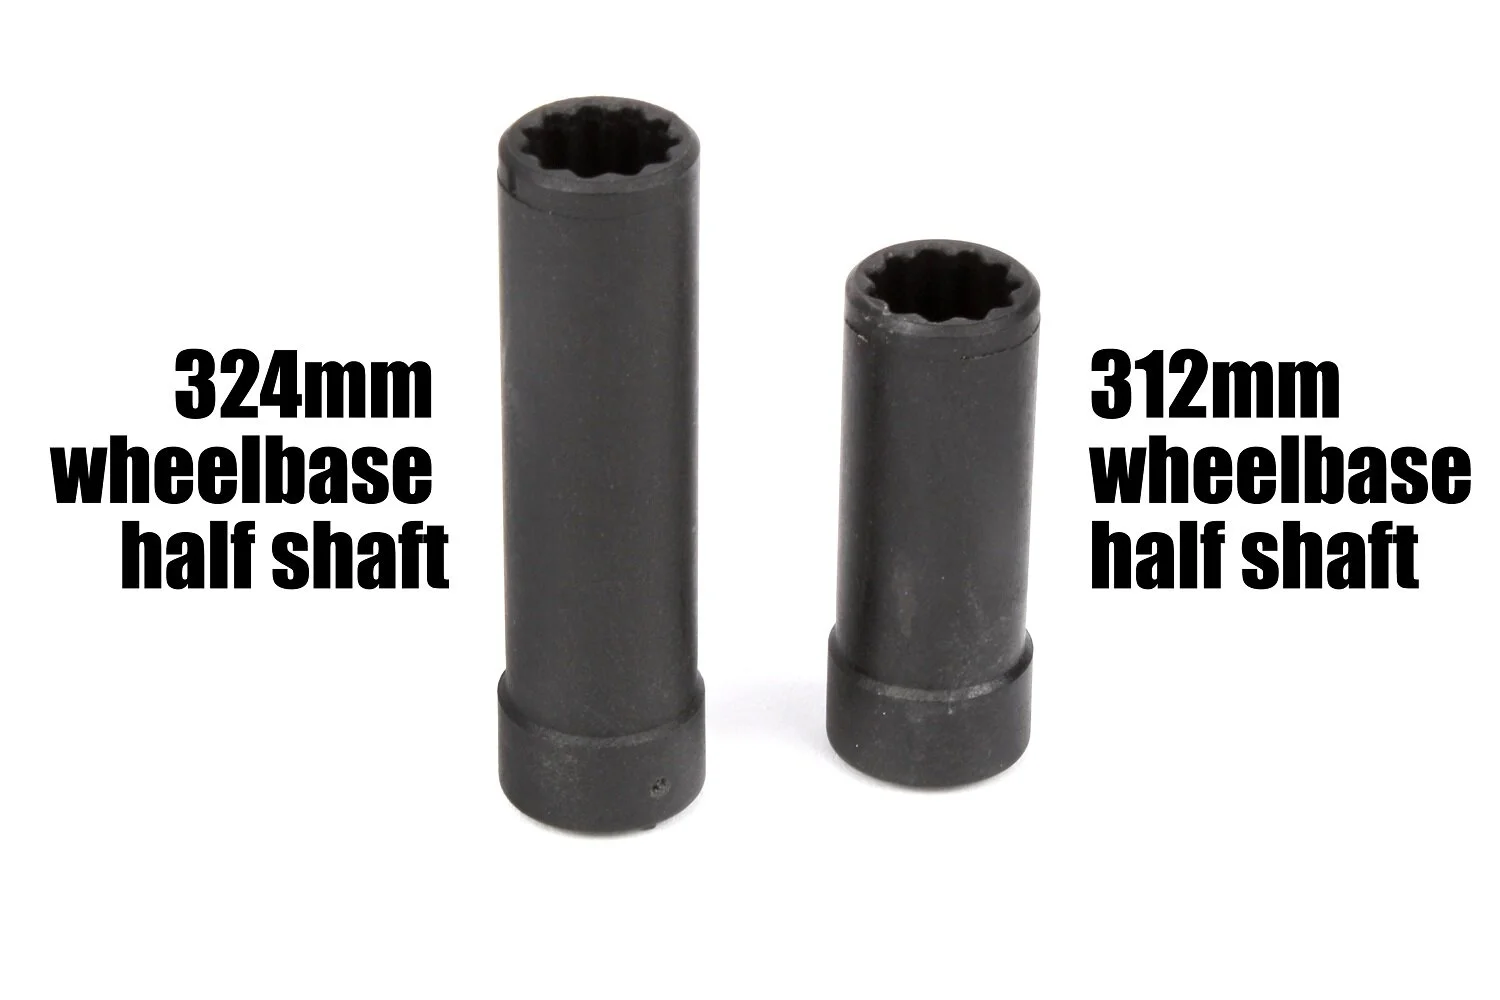
7) Separate the female half shaft on the axle side of the driveshaft, and remove the half shaft by inserting a 2 mm driver into the shaft and removing the screw that secures it to the input drive. Install the shorter female half shaft supplied with the conversion kit, and reassemble the driveshaft. Be sure to line up the alignment marks molded into the driveshaft halves.

Remove the half shaft

Half Shaft Comparison
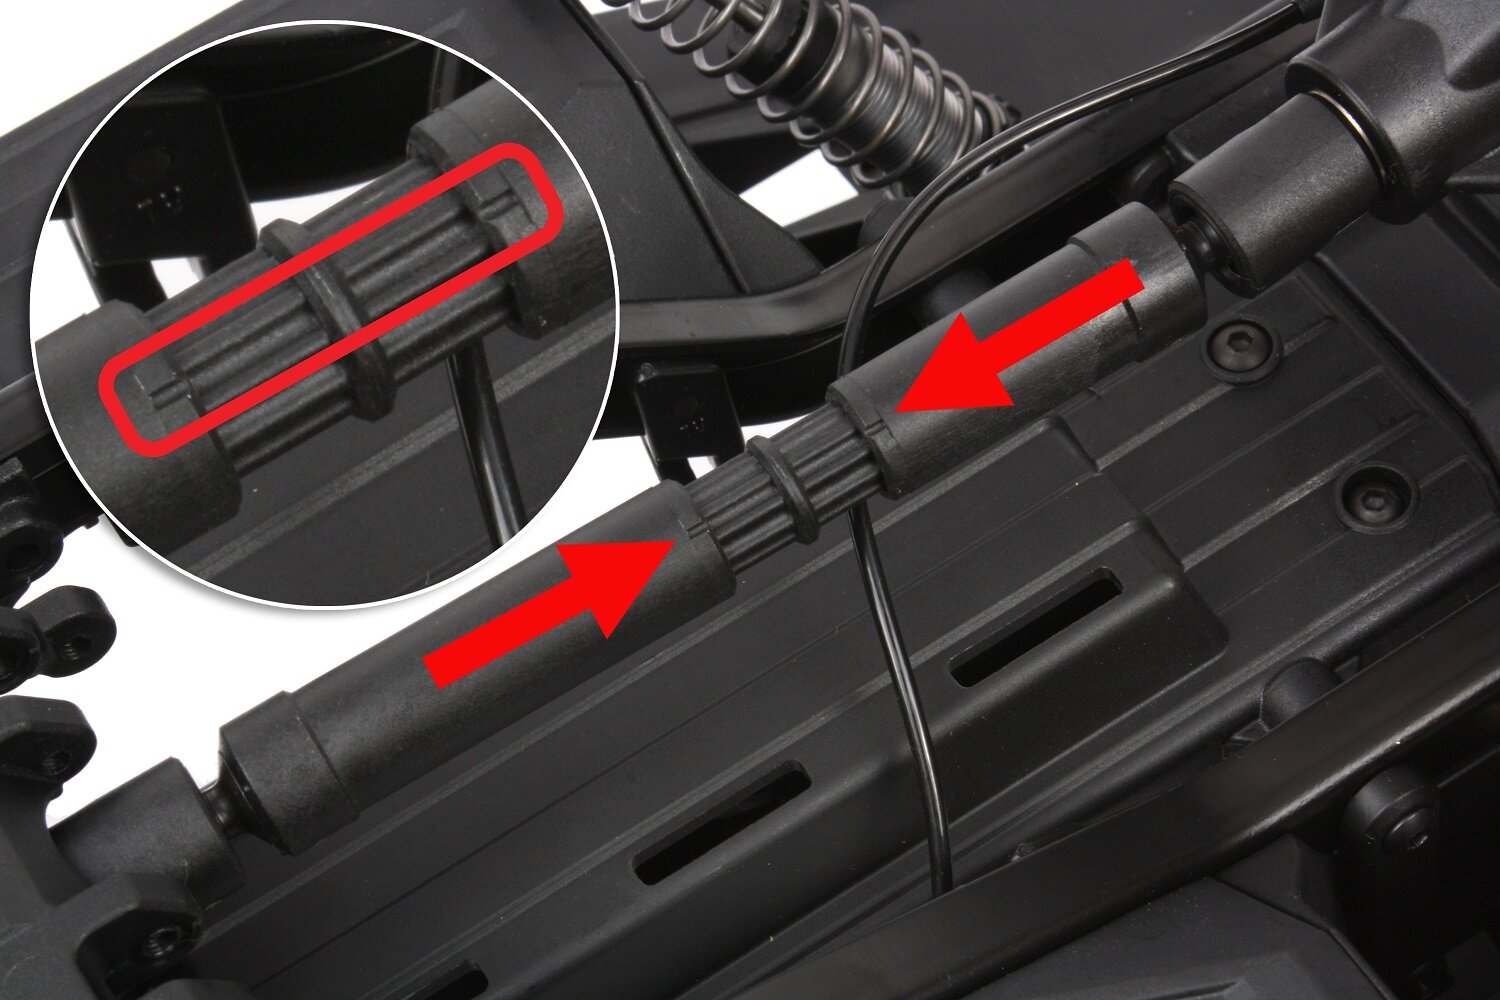
Align the Half Shafts
8) Reverse the procedure in step 6 to replace the stock links with the new, shorter links supplied in the conversion kit. Note that the upper links have angled rod ends, while the lower links have straight ends. Turn the chassis right side up. Reinstall the rock sliders and wheels, and your TRX-4 is ready for the body of your choice.

Replace the Stock Links
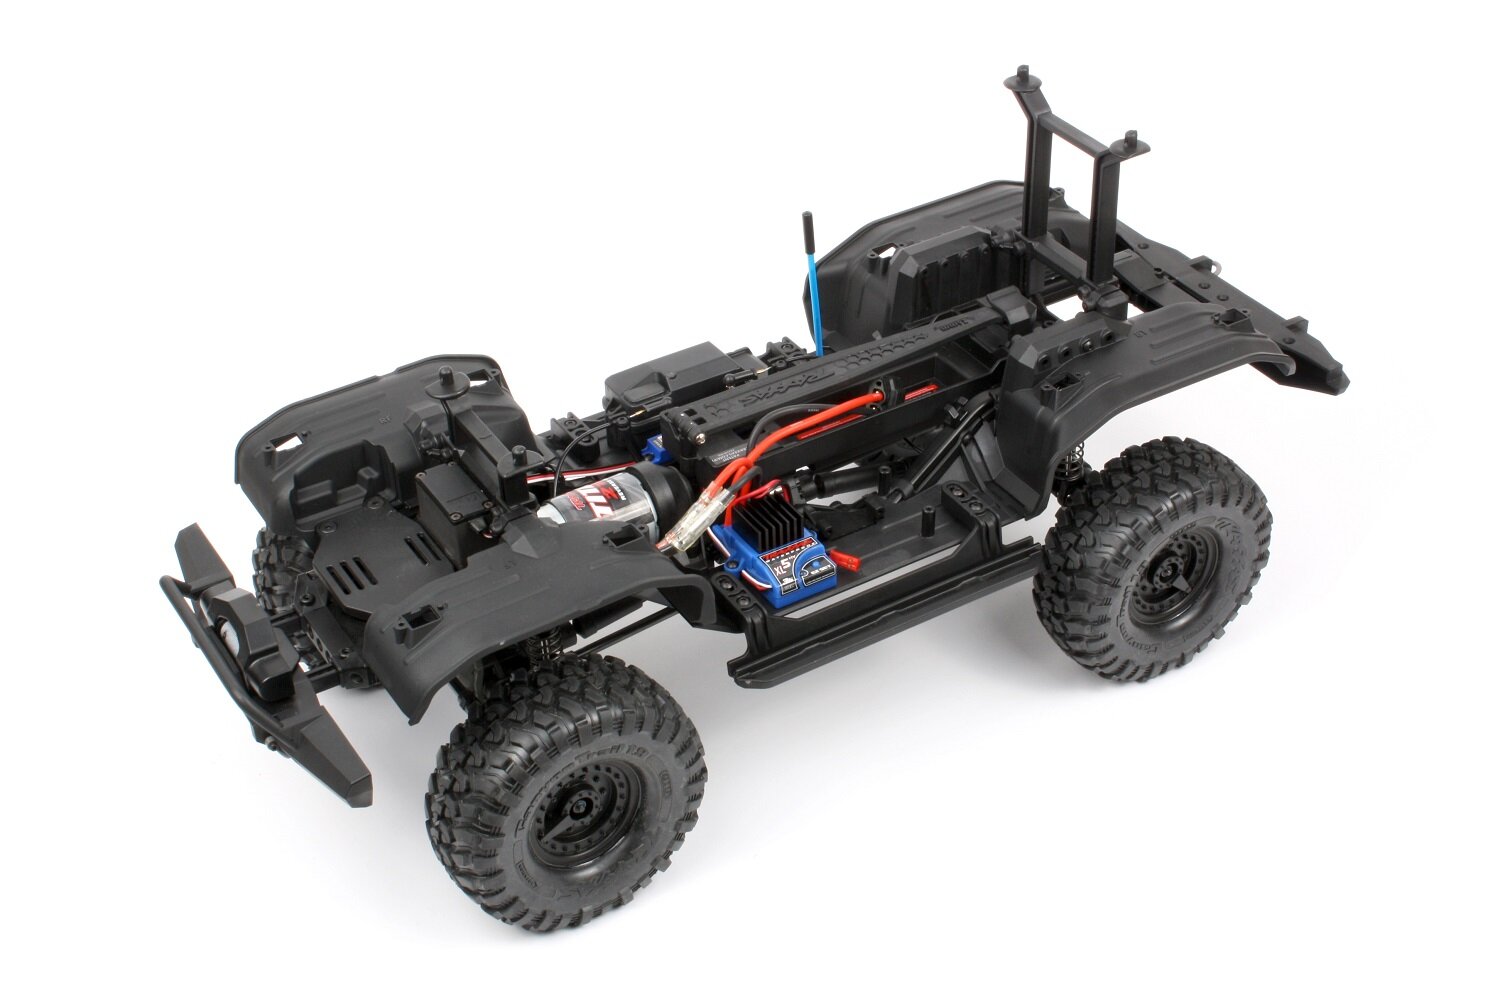
Reinstall the Rock Sliders and Wheels
Since we started with a TRX-4 Tactical Unit, the chassis already had the long rear body posts installed. The Blazer body kit includes the longer posts in case you need them. That marks the end of our TRX-4 wheelbase conversion! If you're not using the inner fenders in the conversion kit, read the next section to see how to convert your truck without them.

How to Convert Your Wheelbase Without Inner Fenders
If you're installing the #8058 Chassis Conversion Kit without the inner fenders, you will also need the #2015 Body Mount setand one 3x8 mm button-head screw.
1) Begin by removing the body and wheels. Next, remove the two screws that secure the rear body mount. Set the body mount aside. Remove the rock sliders for easier access to the screws we’ll be taking out in the next step. Four screws secure each rock slider.

Remove the Body and Wheels
Remove the Rear Body Mount

Remove the Rock Sliders
2) Remove the screws that secure the shocks to the rear shock towers. Next, remove the screws shown from each side of the chassis, and remove the rear shock towers. Finally, swap the shock tower positions from left to right, and reinstall the towers on the chassis “one hole forward” from their previous positions, as shown. Reinstall the 3x23 mm screws that secure the shocks to the towers.

Unscrew the Rear Shocks

Remove the Rear Shock Towers

Rear Shock Tower Position
3) Remove the screw that secures the rear upper links to the rear axle. Next, flip the chassis over and remove the screws that secure the lower links to the axle, and remove the screws that secure the upper and lower links to the chassis.

Remove the Axle Screw
Remove the Link Screws
4) Separate the female half shaft on the axle side of the driveshaft, and remove the half shaft by inserting a 2 mm driver into the shaft and removing the screw that secures it to the input drive. Install the shorter female half shaft supplied with the conversion kit, and reassemble the driveshaft. Be sure to line up the alignment marks molded into the driveshaft halves.

Remove the Half Shaft
Half Shaft Comparison

Align the Halfshafts
5) Reverse the steps in part 3 to replace the stock links with the new, shorter links supplied in the conversion kit. Note that the upper links have angled rod ends, while the lower links have straight ends. Turn the chassis right side up. Install the offset body mount supplied with #2015 body mount set using the 3x20 mm screws you removed in step 2, and an additional 3x8 mm screw where the mount attaches to the chassis crossmember. Transfer your TRX-4’s original body posts to the new body mount.

Replace the Stock Links

Install Offset Body Mount

Install Body Posts
6) Reinstall the rock sliders and wheels, and your TRX-4 is ready for the body of your choice.
Repost from: https://traxxas.com/news/how-to-shorten-trx4-wheelbase